Small Edema Box
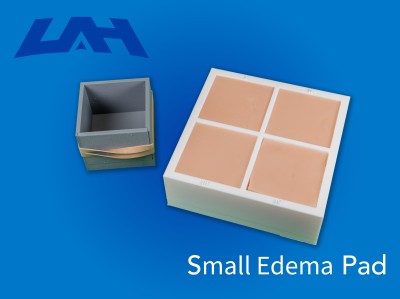
Pictured is a 4.5x4.5x1.75 mini edema box along with its mold and edema pads. It is used by the College of Nursing to demonstrate the 4 levels of pitting edema.
Ingredients
- Dragon Skin Part A
- Dragon Skin part B
- Dragon Skin Part S (Smooth-on)
- Mold Release (Smooth-on)
- Flesh Pigment (Smooth-on)
- Plastic Cups
- Stirrers
- Scale
- Baby Powder
- Rubber Bands
- 3d Printed Edema Box Molds (STL in downloads) (Suggested to print multiple)
- 3d Printed Edema Box (STL in downloads)
Instructions
- Thoroughly spray mold release into the mold, making sure to get all the crevices and corners
- Put plastic cup on scale and tare the scale
- Pour 33 ml of Part B into the cup
- Insert desired pigment into the cup until you reach the desired skin tone
- Use a stirrer and mix the pigment and Part B together (leave stick in the cup)
- Tare the scale again
- Pour 16 ml of Part S into the cup. Thoroughly mix together until fully combined, making sure you scrape down the sides of the cup.
- Tare the scale again and spray the mold with mold release a second time.
- Pour in 33 ml of Part A, and thoroughly mix making sure there are no clumps or pockets of unmixed dragon skin.
- Pour the mixture into the mold. There is a 12 minute pot time before the mixture starts curing.
- Let the mixture cure completely for 40 minutes and pull the part out of the mold (if using one mold).
- Grab a new cup and tare the scale.
- Pour in 30 ml of Part B.
- Add your pigment, trying to color match your first pour as closely as possible. Mix thoroughly.
- Tare the scale again.
- Pour in 23 ml of Part S. Mix completely.
- Pour in 30 ml of Part A and mix until completely combined.
- Once completely combined, pour the mixture into the empty mold.
- Let the mixture cure completely for 40 minutes and pull the part out of the mold (if using one mold).
- Grab a new cup and tare the scale.
- Pour in 28 ml of Part B.
- Add your pigment, trying to color match your first pour as closely as possible. Mix thoroughly.
- Tare the scale again.
- Pour in 28 ml of Part S. Mix completely.
- Pour in 28 ml of Part A and mix until completely combined.
- Once completely combined, pour the mixture into the empty mold.
- Let the mixture cure completely for 40 minutes and pull the part out of the mold (if using one mold).
- Grab a new cup and tare the scale.
- Pour in 27 ml of Part B.
- Add your pigment, trying to color match your first pour as closely as possible. Mix thoroughly.
- Tare the scale again.
- Pour in 34 ml of Part S. Mix completely.
- Pour in 27 ml of Part A and mix until completely combined.
- Once completely combined, pour the mixture into the empty mold.
- Let the mixture cure completely for 40 minutes.
- Demold all parts still in the molds, keeping track of which pad is which level.
- Use a paper towel to wipe off any mold release residue left on the parts.
- Once dry, put baby powder on the foot to remove tackiness and to give a flesh-like feel.
- Use a sharpie to mark the level corresponding to each pad on a side of the part. Then put each part into the edema pad box.